
⚠️ Note: This guide covers steel gas tanks. Many modern dirt bikes, enduros, and some street bikes (certain KTM, BMW, Husqvarna models) use polymer/plastic tanks that don't rust. If your bike has a plastic tank, rust isn't your problem — but ethanol-related fuel degradation and phase separation can still cause issues. Everything below applies to steel tanks only.
Steel gas tanks rust from the inside out. When a tank sits with air space above the fuel level, condensation forms on the exposed inner walls — especially in humid climates or during winter storage. That moisture plus bare steel equals iron oxide. Over time, rust flakes break off and contaminate the fuel, clogging the petcock filter, fuel line, and carburetor jets (or fuel injectors on modern bikes). A severely rusted tank can clog a carb’s pilot jet in a single ride. On fuel-injected bikes, rust particles often clog the tiny internal basket filter (micro-filter screen) inside each injector before reaching the nozzle itself. These basket filters cost $1–$3 each and are replaceable with a simple extraction tool — a cheap fix that can save a $100–$150 injector from being thrown away.
Knowing how to clean a rusty gas tank motorcycle owners dread dealing with can save you the $200–$500 cost of a replacement tank — or $500–$1,500+ for a hard-to-find tank on a vintage bike. This guide covers 5 real methods ranked from cheapest to most thorough, with exact costs, time requirements, and guidance on which method to use based on your rust severity. The right approach depends entirely on how bad things are — and assessing that correctly is step one.
How Bad Is Your Rust? (Assess Before You Clean)
Before you buy anything or pour anything into your tank, figure out what you’re dealing with. This determines which method will actually work — and which would be a waste of time and money.
Level 1 — Light Surface Rust (Orange Film)
The inner walls have a thin orange/brown discoloration but no flaking or pitting. The metal feels mostly smooth if you run a finger along the inside. Fuel may look slightly discolored but has no visible particles. This is common on tanks that sat for 3–6 months without fuel stabilizer.
→ Methods 1 or 2 will fix this.
Level 2 — Moderate Rust (Flaking Scale)
Visible rust flakes floating in the fuel or collecting at the bottom. The tank interior has rough, scaly patches. The petcock filter may already be clogged. Common on tanks that sat for 1–3 years or were stored without a full tank. If you have a borescope or endoscope camera ($15–$25 on Amazon), now is the time to use it for a proper look.
→ Methods 2, 3, or 4 are needed.
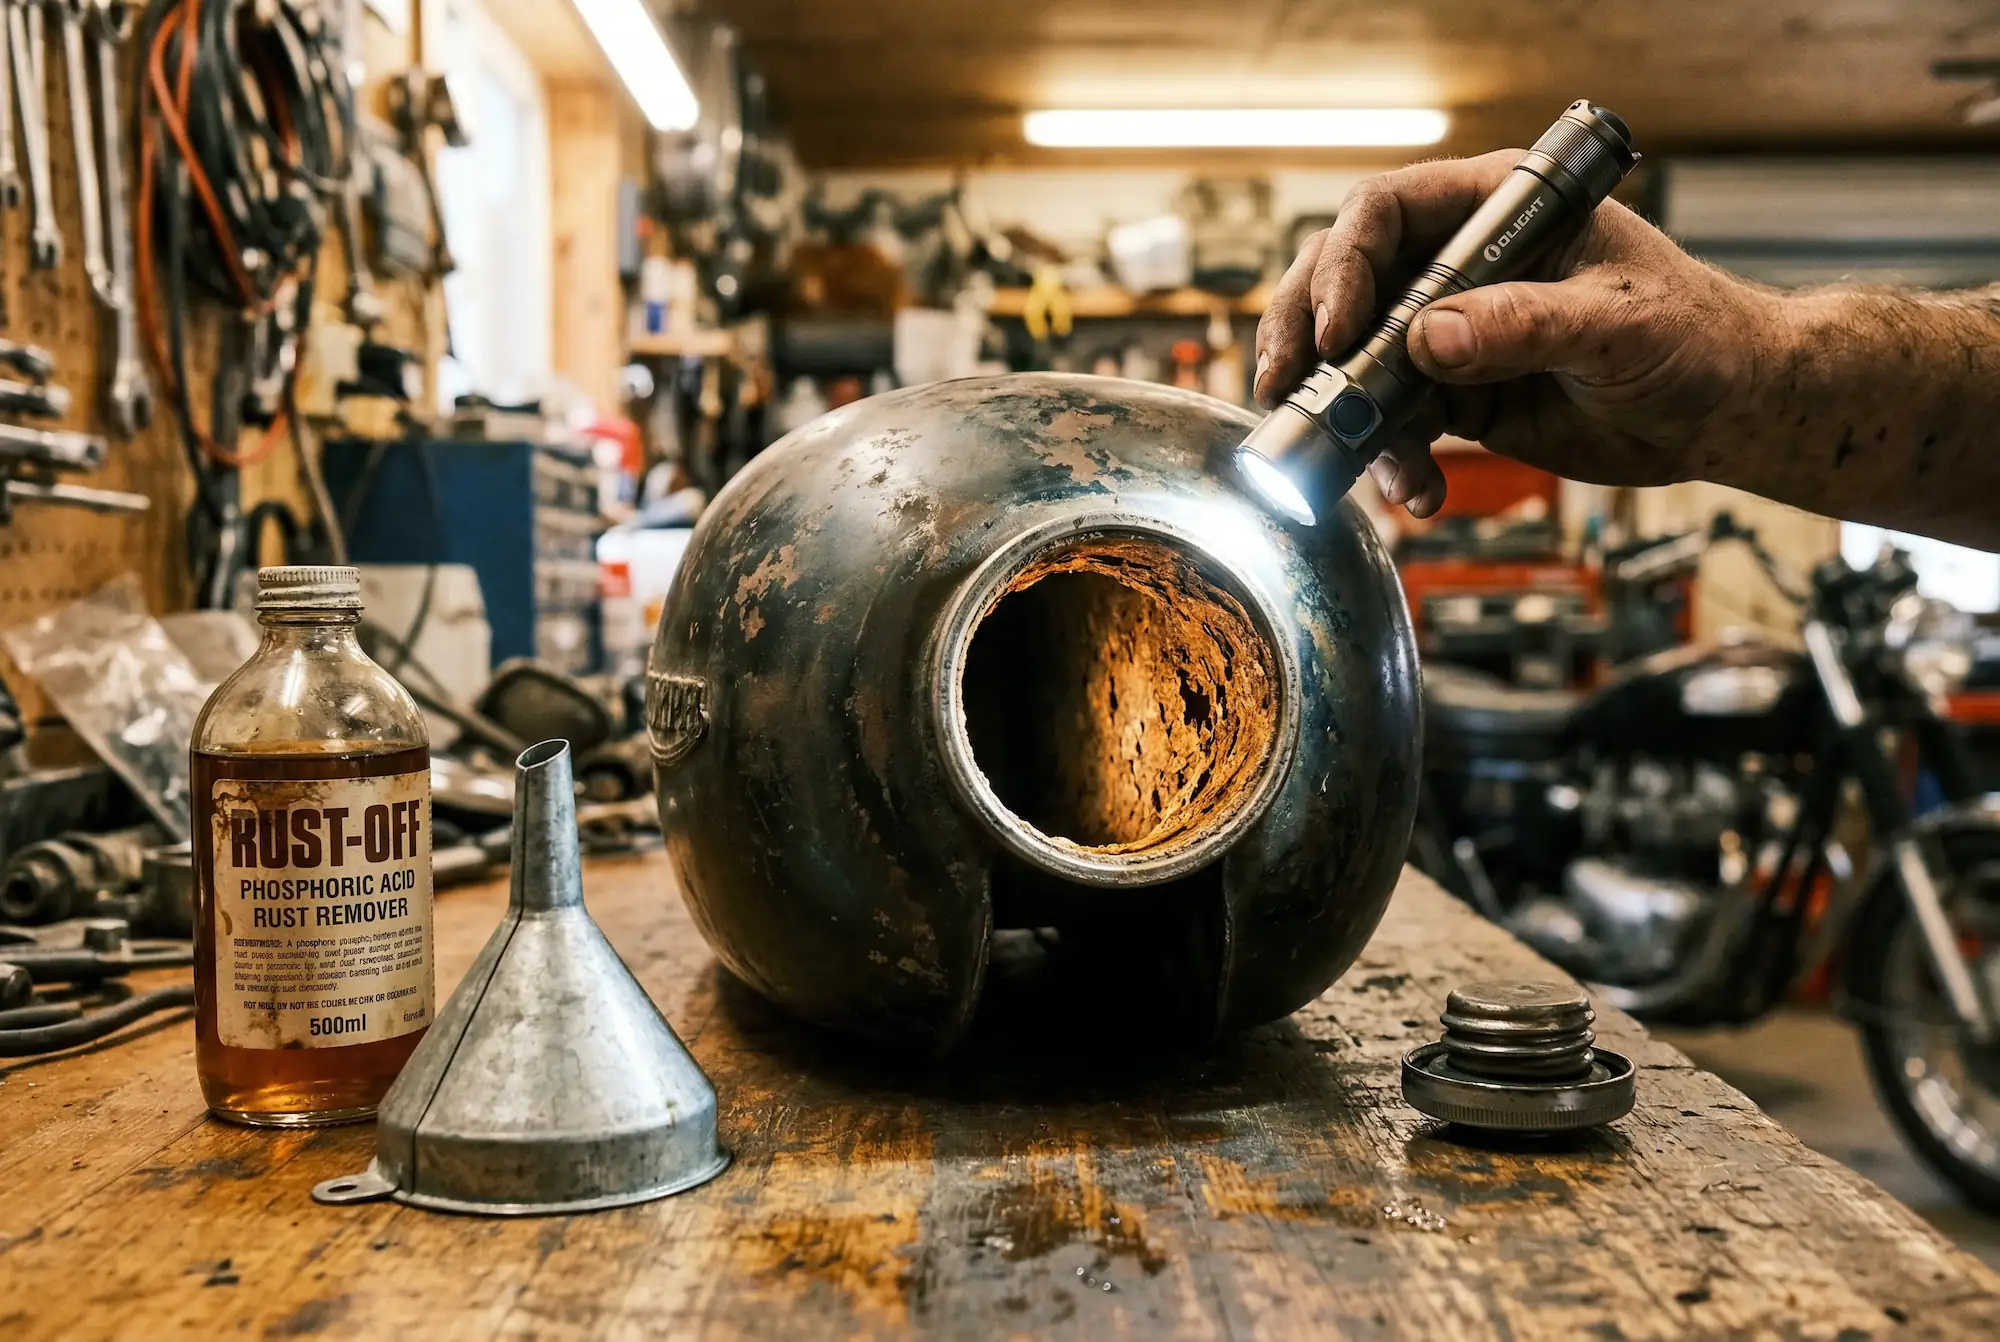
Level 3 — Severe Rust (Deep Pitting / Pinhole Risk)
Heavy rust throughout, deep pits visible in the metal, possible thin spots or pinholes where rust has eaten through. Fuel comes out brown. The tank may weep fuel from pinhole leaks. Common on barn-find bikes that sat 5+ years.
→ Method 4 or 5 required. Method 5 (tank sealer) can also seal small pinholes.
⚠️ Warning: If the tank has large pinholes or structural thin spots, no cleaning method will save it long-term. A tank with compromised structural integrity should be replaced or professionally repaired (welding or brazing by a qualified fabricator). Fuel leaks are a fire/explosion hazard — don’t gamble with this.
Prep Work — Sealing Your Tank Before Any Method
This is the step most tutorials gloss over, but forums show it’s where beginners fail. Before using ANY liquid method, you must seal every opening in the tank.
Remove the petcock, fuel cap, and any sensors. Plug all openings except the filler neck using rubber stoppers, expandable rubber test plugs ($5–$8 for an assortment at hardware stores), or silicone plugs. Vinyl vacuum caps (as RevZilla’s Lemmy recommends) work well for small holes.
For modern fuel-injected bikes with a fuel pump plate: you’ll need to fabricate or buy a block-off plate with a gasket to seal the large opening. This is the one step that trips up modern bike owners.
If using vinegar, you can leave the fuel cap on (it’ll get de-rusted as a bonus), but tape over the cap vent hole with duct tape to prevent leaks.
⚠️ NEVER use corks or putty to plug holes — they dissolve or pop out under chemical pressure and you’ll be soaked in acid. Use proper rubber plugs.
Method 1 — Vinegar Rust Removal Motorcycle Tank (Cheapest Option)
Best for: Level 1 light rust | Cost: ~$5–$10 | Time: 24–72 hours
- Fill the tank completely with plain white vinegar (5% acidity — standard grocery store stuff). Filling completely is critical: any air space above the vinegar line won’t get treated, and the vinegar/air boundary can etch an uneven line into the metal.
- Soak for 24–72 hours depending on severity. Check progress at 24 hours by draining a bit and inspecting with a flashlight.
- Drain the vinegar — it will be dark brown/orange.
- Rinse thoroughly — at least 3–4 changes of clean water.
- Neutralize immediately with a baking soda solution (2 tablespoons per liter of water). Swish for 2–3 minutes, drain.
- Dry the tank FAST and protect immediately — blow compressed air through it, then use a heat gun on low or a hair dryer. Leave in direct sunlight if possible. ⚠️ Flash rust on freshly exposed bare steel can begin in under 15 minutes in humid conditions — not hours, minutes. The chemically clean surface has zero protective layer and oxidizes almost on contact with moist air.
- Protect the bare metal IMMEDIATELY after drying. If you’re filling with fuel right away, do it now. If not, fog the tank interior with WD-40 or 2-stroke oil by spraying liberally inside and rotating the tank to coat all surfaces. This buys you 24–48 hours before you need to fill or seal. Do NOT leave clean bare metal exposed to air — even for an hour in humid weather.
⚠️ Temperature matters: Vinegar is a weak acid and its reaction rate drops dramatically in cold weather. Below 65°F (18°C), soak times can double or triple. In a cold garage in winter (below 50°F / 10°C), vinegar may barely work at all even after 72 hours. For best results, work in a heated space or use an aquarium heater / bucket heater ($15–$25) to keep the solution at room temperature or warmer.
Pros: Cheap, non-toxic, available everywhere, safe for beginners.
Cons: Slow (24–72 hrs), only effective on light rust, the vinegar smell is intense and lingers.
Forum tip: Multiple riders report great results on light rust, but emphasize the flash-rust risk. One rider on HondaTwins.net reported shaking sheetrock screws inside the tank with vinegar for combined mechanical and chemical action — aggressive but effective if you’re impatient.

Method 2 — Phosphoric Acid / Evapo-Rust (Mid-Grade Option)
Best for: Level 1–2 rust | Cost: ~$10–$25 | Time: 2–12 hours
Fill with your chosen solution:
Evapo-Rust (~$20/gallon) — chelation-based, technically not an acid, very safe. Reusable for 2–3 uses. Soak time: 4–12 hours. Forum veterans on FJROwners.com and multiple Honda communities consistently call this their go-to after trying everything else.
Ospho or Metal Prep (~$12/quart) — phosphoric acid-based, dilute 1:1 with water. Soak time: 2–6 hours.
Klean-Strip Phosphoric Prep & Etch (~$15–$20/gallon at Home Depot) — phosphoric acid in bulk, a budget favorite on Honda forums for large tanks.
⚠️ Temperature warning (especially Evapo-Rust): Evapo-Rust's chelation process is highly temperature-dependent. According to the manufacturer's technical data sheet, effectiveness drops significantly below 60°F (15°C), and below 50°F (10°C) it becomes nearly inert. The label recommends using at 65°F or warmer. If working in a cold garage: bring the tank inside to a heated room, or place the filled tank in a larger container of warm water as a heat bath. An aquarium heater ($15–$25) submerged in the solution works well. Never directly heat chemicals on a stove or with an open flame.
Agitate every 30–60 minutes — rotate the tank to ensure full coverage on all internal surfaces.
Drain, rinse thoroughly (3–4 water changes minimum).
Phosphoric acid converts rust to iron phosphate — a dark grey/black coating that’s actually a mild protective layer. You don’t strictly need to neutralize with baking soda (unlike vinegar or muriatic acid), but a thorough water rinse is essential.
Dry thoroughly and protect immediately. Flash rust begins within minutes on freshly exposed metal, even with the partial phosphate layer. Fog with WD-40 or 2-stroke oil if you can’t fill with fuel right away.
Pros: Faster than vinegar, converts rust to a semi-protective coating, Evapo-Rust is reusable and extremely safe (non-toxic, biodegradable).
Cons: More expensive, requires gloves and eye protection for acid-based options.
Method 3 — Muriatic Acid (Fast but Aggressive)
Best for: Level 2 moderate rust | Cost: ~$8–$12 | Time: 10–20 minutes per interval
- Work outdoors or in a very well-ventilated garage. Muriatic acid (hydrochloric acid / HCl) produces toxic fumes.
- Dilute the acid — 1 part acid to 10 parts water. ⚠️ ALWAYS add acid to water, NEVER water to acid — adding water to concentrated acid causes a violent exothermic reaction that splashes acid.
- Pour diluted acid into the sealed tank. You’ll hear fizzing immediately.
- Soak in SHORT intervals of 10–20 minutes only, then drain, rinse with water, and inspect progress. Repeat if needed. Do NOT do a single continuous soak of 1–2 hours — this is where tanks get destroyed. RevZilla’s professional mechanic Lemmy confirms that 15 minutes “usually does wonders on even deeply damaged tanks.” The acid doesn’t just eat rust — once the rust is gone, it immediately starts eating the base steel underneath, thinning walls that are already compromised. On vintage tanks with thin-gauge steel or soldered/brazed seams, continuous acid exposure can create the very pinholes you’re trying to avoid.
- Drain immediately when rust is gone. Do NOT leave it longer “just to be sure.”
- Rinse with copious water (at least 5 changes).
- Neutralize with baking soda solution — essential with HCl.
- Dry and protect INSTANTLY. Muriatic acid leaves chloride ions embedded in the steel surface that accelerate future rusting. Flash rust after HCl treatment is even faster than after other methods — it can begin within minutes. Fog with WD-40 or 2-stroke oil immediately after drying, and fill with fuel or apply sealer as soon as possible. Some experienced mechanics follow the muriatic rinse with a phosphoric acid rinse (Ospho) to convert any remaining surface oxidation to a protective phosphate layer.
⚠️ Safety (critical):
Chemical-resistant gloves (nitrile, not latex), safety goggles, work in open air. HCl fumes are toxic — irritate lungs, eyes, and skin. Do NOT use on chromed tanks — acid destroys chrome plating. Do NOT use on tanks with lead-soldered or brazed seams — HCl attacks solder rapidly and can open seams. Have baking soda and clean water within arm’s reach before you start. Dispose responsibly: neutralize with baking soda until fizzing stops, then dilute with plenty of water.
Pros: Very fast, very cheap, extremely effective on moderate rust.
Cons: Dangerous if mishandled, attacks base metal if over-soaked, not for beginners, fumes require outdoor work. Residual chloride ions can accelerate future re-rusting if not thoroughly neutralized.
Method 4 — Electrolysis (Most Thorough, Zero Metal Loss)
Best for: Level 2–3 rust | Cost: ~$15–$25 (if you have a battery charger) | Time: 6–24 hours (hands-off)
This is the method that forum veterans consistently rank as the best for motorcycle gas tank rust removal. It removes rust WITHOUT removing any base metal, making it ideal for vintage or thin-walled tanks. Surprisingly few published guides cover it, but riders who’ve tried everything else swear by it.
- Mix electrolyte: 1 tablespoon of washing soda (sodium carbonate — NOT baking soda) per gallon of water. Fill the tank.
- Create a sacrificial anode: cut a piece of rebar or scrap mild steel to fit inside the tank through the filler neck. It must NOT touch the tank walls — use a wooden dowel or plastic spacer to keep it centered.
- Connect a manual battery charger: Positive (red) clip → rebar anode. Negative (black) clip → clean bare-metal spot on the outside of the tank (making the tank the cathode).
- Set to 2–6 amps. Higher amps = faster but more hydrogen gas production.
- Leave for 6–24 hours. You’ll see bubbles — hydrogen at the tank (cathode), oxygen at the rebar (anode). The process electrochemically reverses oxidation.
- The rebar will corrode and turn into a rusty mess — that’s the point. It sacrifices itself to save the tank.
- Drain, rinse with clean water, dry and protect IMMEDIATELY. Flash rust on electrolysis-cleaned metal happens fast — within minutes in humid conditions, not hours. Fog with WD-40 or 2-stroke oil if you can’t fill with fuel right away.
⚠️ Safety:
Electrolysis produces hydrogen gas (flammable/explosive). Well-ventilated area only. No sparks, no smoking nearby.
Do NOT use stainless steel as the anode — it releases hexavalent chromium into the electrolyte, which is toxic and carcinogenic. Use plain rebar or mild steel only.
Use a manual charger, not a “smart” charger — smart chargers detect the unusual load and refuse to operate.
Pros: Removes rust without removing ANY metal (unlike all acid methods), extremely thorough, cheap, environmentally the cleanest method.
Cons: Requires setup knowledge, hydrogen gas risk, only works on conductive (steel) tanks, slower than acid.

Method 5 — Commercial Motorcycle Tank Sealer Kit (The All-In-One Solution)
Best for: Any rust level, especially Level 3 where you want to seal pinholes | Cost: $35–$60 | Time: 1–2 days (including curing)
The three most popular kits:
Kreem Tank Liner Kit (~$35–$42) — acid etch + prep + white elastomer liner coating. Widely available at motorcycle shops.
POR-15 Fuel Tank Repair Kit (~$40–$55, motorcycle-specific version) — Marine-Clean degreaser + Metal-Ready etch + POR-15 sealer (silver epoxy). Includes cloth patch for sealing larger holes.
Caswell Tank Sealer (~$45–$55 for motorcycle size) — phenol novolac epoxy with 3,000 PSI bond strength. Highly rated in the vintage bike community for its thick, durable coating. Key advantage: unlike Kreem and POR-15, Caswell’s novolac epoxy generally does not require an acid etch step. It relies on mechanical abrasion (shaking drywall screws inside the tank) instead. This eliminates the most failure-prone step in the sealer process — improper acid etching is the #1 cause of sealer failure across all brands. Caswell’s instructions state the epoxy “prefers to bond to a rough rusty surface.” Additionally, Caswell’s novolac formula is specifically designed for resistance to ethanol-blended fuels — a critical advantage as E10 and E15 become standard.
General 4-step process (varies by brand):
- Degrease the interior with the included cleaner (or acetone/lacquer thinner for Caswell).
- Acid etch to dissolve rust and prep metal for adhesion (2–12 hours depending on kit). Note: Caswell replaces this step with mechanical abrasion — shake a handful of drywall screws vigorously inside the tank to roughen the surface.
- Dehydrate: Rinse the interior with acetone or lacquer thinner (~1 pint) to absorb every trace of water, then blow dry with compressed air. This step is critical and often omitted from basic tutorials. Most sealers (except moisture-curing products like certain POR-15 formulas) will fail to adhere properly if any water remains on the tank walls. The acetone bonds with water molecules and evaporates them away.
- Apply sealer — pour in, rotate to coat every surface, drain excess, cure 24–48 hours.
The honest truth about tank sealers (from forums):
Tank sealers are controversial. When they work, they’re fantastic — permanent rust protection AND pinhole sealing. When they fail, they’re a nightmare. The sealer peels in sheets, and those flakes travel through your fuel system and clog everything — carbs, injectors, petcock. Multiple riders on Honda forums, vintage bike communities, and Reddit report this exact scenario.
The #1 cause of sealer failure: insufficient surface preparation. Do the prep steps TWICE. That extra hour of work is cheaper than redoing the entire job or buying a new carb rebuild kit.
⚠️ Pro tip: If the sealer fails, removing it requires aircraft stripper (methylene chloride) and hours of work. This decision is essentially irreversible. Understand that before you pour.
Pros: All-in-one solution, seals pinholes, prevents future rust.
Cons: Most expensive, sealer failure is catastrophic, essentially irreversible, requires meticulous prep.
How to Clean a Rusty Gas Tank Motorcycle — All 5 Methods Compared
| Method | Cost | Time | Rust Level | Skill Level | Seals Pinholes? | Removes Metal? | Flash-Rust Risk |
|---|---|---|---|---|---|---|---|
| Vinegar soak | $5–$10 | 24–72 hrs | Light (1) | Beginner | No | No | High — protect within minutes |
| Phosphoric acid / Evapo-Rust | $10–$25 | 2–12 hrs | Light–Moderate (1–2) | Beginner–Intermediate | No | Minimal | Moderate — phosphate layer helps |
| Muriatic acid | $8–$12 | 10–20 min intervals | Moderate (2) | Intermediate (safety!) | No | Yes — risk if over-soaked | Very High — protect instantly |
| Electrolysis | $15–$25 | 6–24 hrs | Moderate–Severe (2–3) | Intermediate | No | No (safest for metal) | High — protect within minutes |
| Commercial sealer kit | $35–$60 | 1–2 days | Any (1–3) | Intermediate | Yes (small) | Depends on acid step | Low — sealer coats metal |
The Drying Stage — Don’t Skip This (Most Common Mistake)
Every forum is full of “I cleaned my tank perfectly and it flash-rusted overnight” posts. Whether you’re learning how to clean a rusty gas tank motorcycle style for the first time or doing your fifth restoration, drying is where most DIY rusty motorcycle tank treatment jobs fail.
Shake out as much water as possible — flip the tank quickly with the filler hole at the lowest point. The water sheets over the internal lip better with a quick flip than a slow pour.
Use a heat gun or hair dryer with the petcock holes open for air circulation. Stand the tank vertically so it acts like a chimney — hot air rises, carrying moisture out.
Rock the tank periodically as it heats — water puddles in seams and crevices. When moved over hot metal, it evaporates fast.
Don’t overheat — check the area under the filler cap (hottest spot). You’re drying, not cooking.
A bone-dry tank in 15–20 minutes is achievable with a heat gun. Compressed air alone takes longer and can contain moisture itself (unless you have a water separator on your compressor).
⚠️ CRITICAL: Once the tank is dry, you have MINUTES — not hours — before flash rust begins. Bare steel that has been chemically cleaned has zero protective layer. In humid conditions (above 60% relative humidity), visible orange rust can appear in under 15 minutes. Multiple motorcycle restorers report seeing rust return "before I could walk to the garage to get the fuel can."
Your options after drying (in order of preference):
- Fill with fuel immediately — the best option if you’re reinstalling the tank right away.
- Apply tank sealer immediately — if you’re going the sealer route, the acetone dehydration rinse + sealer application should happen right after drying.
- Fog with WD-40 or 2-stroke oil — spray liberally inside and rotate the tank to coat all walls. This provides 24–48 hours of temporary protection. When ready to fill or seal, degrease with acetone first.
- Rinse with Evapo-Rust (undiluted) — per the manufacturer, this leaves a short-term rust-inhibiting film for up to 2 days.
How to Prevent Motorcycle Gas Tank Rust in the Future
Store with a full tank + fuel stabilizer (Sta-Bil, PRI-G — 1 oz per 2.5 gallons). A full tank minimizes air space and condensation.
Use ethanol-free fuel if available — E10 absorbs water from the atmosphere. Check pure-gas.org for stations near you (over 12,000 stations listed across the US).
Drain carb float bowls before storage — prevents varnish buildup in jets.
Keep the bike in a dry environment — a cheap dehumidifier ($30–$50) in the garage dramatically reduces condensation.
Add an inline fuel filter ($5–$10) if your bike doesn’t have one — catches rust particles before they reach the carb. On fuel-injected bikes, also consider periodically inspecting or replacing the injector basket filters ($1–$3 each, available in multi-packs on Amazon) — these tiny internal screens are the first line of defense and the first thing to clog from rust particles.
Frequently Asked Questions
Can I use Coca-Cola to clean a rusty motorcycle gas tank?
Technically, yes — Coca-Cola contains phosphoric acid. But it’s slow (48–72 hours), expensive compared to actual phosphoric acid products ($15+ worth of Coke for one tank), and the sugar leaves a sticky residue that requires extensive rinsing. Evapo-Rust or Ospho are far more practical. Coke is a fun YouTube experiment, not a serious method.
How long can a motorcycle sit before the gas tank rusts?
In humid environments with a partially full tank, surface rust can begin within 30–60 days. In dry climates, 6+ months. Tanks stored completely empty in humid conditions rust even faster because the entire interior is exposed. Safest approach: full tank + fuel stabilizer for any storage beyond 2 weeks.
Will a rusty gas tank damage my engine?
Not directly — rust particles get trapped by the fuel filter or carb jets. The real damage is indirect: clogged petcock, clogged carb jets, fuel starvation. A starved engine runs lean, which can cause overheating. On fuel-injected bikes, rust can damage the fuel pump ($100–$300) and injectors ($50–$150 each). Often what clogs first on injectors isn’t the nozzle itself but the internal basket filter (micro-filter screen) — a replaceable $1–$3 part that sits inside the fuel inlet of each injector. Before replacing an expensive injector, check and replace this screen.
Should I seal the tank after cleaning, or just use it bare?
If rust was light and you ride regularly, fuel provides adequate corrosion inhibition — fill up and ride. If rust was moderate-to-severe, or you store seasonally, a sealer provides long-term protection. Middle-ground option: ethanol-free fuel + stabilizer for storage + full tank. This prevents re-rusting without the commitment (and risk) of a sealer.
Can I clean motorcycle fuel tank rust without removing it from the bike?
Not recommended. Most methods involve filling with liquid that you do NOT want spilling onto your frame, wiring, or engine. Electrolysis requires electrical connections easier to manage off-bike. Removing the tank takes 10–20 minutes on most bikes — worth the effort for a proper job.
Does temperature affect how well rust removal chemicals work?
Yes — significantly. Chemical reaction rates are directly tied to temperature. Evapo-Rust’s manufacturer states it works best above 65°F (18°C) and becomes nearly inert below 50°F (10°C). Vinegar and phosphoric acid solutions are similarly affected. A basic chemistry principle: every 10°C drop in temperature roughly halves the reaction speed. If you’re working in a cold garage in winter, either bring the tank inside to a heated room, use an aquarium heater or bucket heater in the solution, or expect soak times to double or triple.
Wrapping Up
Which method to use depends on rust severity and how permanent a solution you want. Vinegar for light surface rust, phosphoric acid or electrolysis for moderate cases, sealer kits for severe rust or long-term prevention. The key prevention takeaway is simple: full tank + fuel stabilizer + dry storage. A $5 can of Sta-Bil is infinitely cheaper than a $400 replacement tank.